Users can sign up for a BrainBot directly on the brainbot.ai website, either by creating their own account directly or by using their Microsoft 365 account. A Creator can also request users subscribe to a private Sequence the Creator has created, either by sending the user a Link (which will guide new users in signing up), or by sending an Invitation (which creates the new user accounts for them). Creators can also request a bulk import to setup a large number of new users quickly – let’s take a look at each of these options.
Learner-Directed Account Creation #
Via the BrainBot Website #
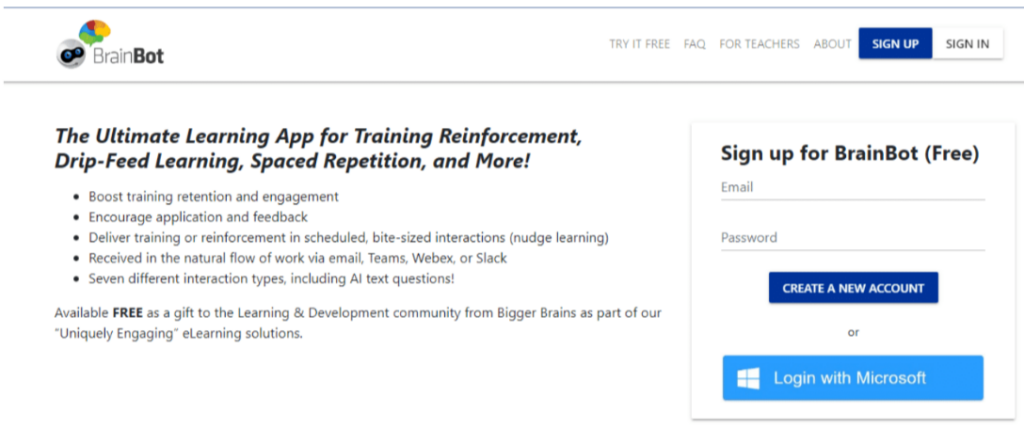
To create an account directly from the BrainBot website, visit www.brainbot.ai. Select SIGN UP, then complete the sign-up form to create a new account. This is the simplest and most straightforward way of signing up.
Login with Microsoft #
If you are using Microsoft 365, you can opt to create a BrainBot account using your Microsoft 365 account. Use the “Login with Microsoft” button on the Sign Up screen to create your BrainBot account from your Microsoft account.

Whether you create an account directly or via the Login with Microsoft button, you can still use Single Sign On with Microsoft 365/ Office 365 / Azure AD if your BrainBot user email matches your Microsoft account email. Clicking “Login with Microsoft” from the Sign Up or Sign In page will use your Microsoft credentials to log you into the BrainBot portal.
Login Via the BrainBot App #
The BrainBot app is designed to work directly within your normal daily workflow and can be added directly within your Teams, Slack or Webex app. Use the Appstore (or similar process for adding apps) for the platform you are using (i.e. Teams, Slack, or Webex). Once the BrainBot app has been added, then give the BrainBot the instruction to “Login” and follow the instructions to create an account.
Creator-Directed Account Creation Methods #
Landing Page Link #
As a Creator, you might want to personally invite someone to sign up for a Sequence you create. Each Sequence has a web address or landing page, called a link, assigned to it. The link is accessible to you, as a Creator, in your Sequences page. Navigate to the desired Sequence and click the three-dot menu. From here, select Go to link.
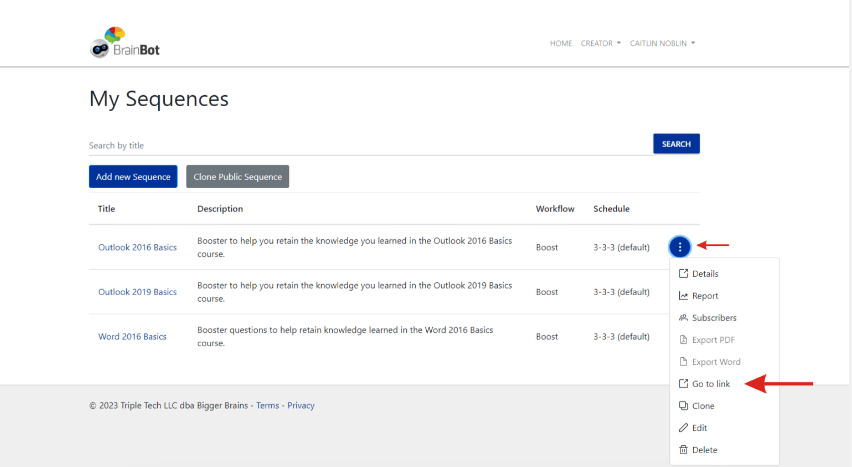
The landing page for the Sequence will open. Copy the web address for the landing page and paste it into whatever tool you are using to communicate with individuals who you would like to invite to sign up for your Sequence.
When your learners receive the link to your specific Sequence, they will be prompted to Login or Sign-Up using the same options mentioned above. After learner’s sign-up, they can then select how they want to receive the Sequence based on the options you will determine when setting up the Sequence.

Invitation (Coming Soon!) #
The Invitation function is a great way for the Creator to create the user accounts for them. After a Sequence is created, the Creator can use the Invitation function to automatically sign up one user or multiple users to that Sequence which will also create accounts for any users that don’t already have one.
To use the Invitation feature:
- Edit the Sequence
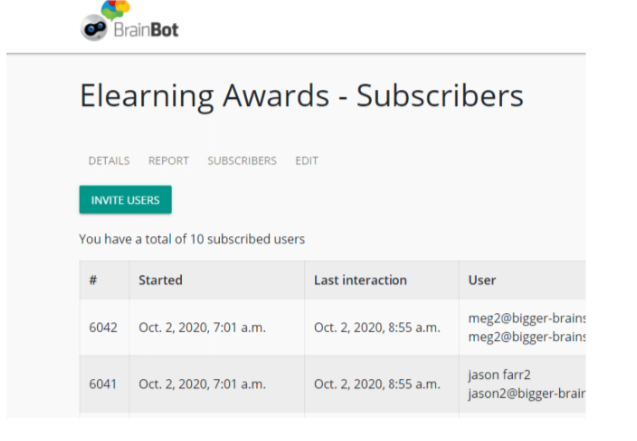
- Choose “Subscribers” from the main menu.
- On the Subscribers list screen, choose the “Invite Users” button:
- To invite a single user, from the Invite Users screen enter the user’s email address in the first field, then choose the channel through which the Booster will be delivered (Email, Teams, etc.) and click “Invite”
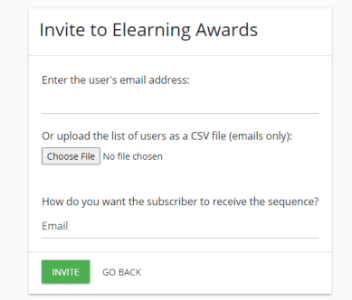
If the user already has a BrainBot account, they will automatically be subscribed to the Sequence. If the user does not have a BrainBot account, they will receive an email with a link to activate their new account and subscribe them to the Sequence.
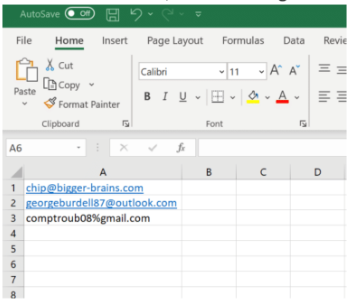
- To invite multiple users, prepare a CSV file with a list of the email addresses for each user. This can be done by using a program like Microsoft Excel, and entering each email address in column A, as in the image below:
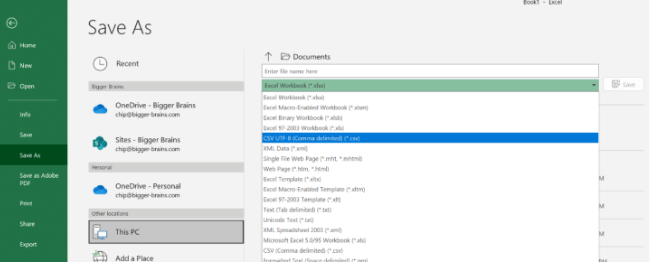
then save the file in CSV format:
From the Invite Users screen, leave the first field blank. Use the “Choose File” button to select the CSV file you created, then choose the channel through which the Booster will be delivered (Email, Teams, etc.) and click “Invite.”
For each user in the CSV file, if the user already has a BrainBot account, they will automatically be subscribed to the Sequence. If the user does not have a BrainBot account, they will receive an email with a link to activate their new account and subscribe them to the Sequence.
Requesting a Bulk Import #
The Invitation feature can be an easy way to add multiple users to your Booster Sequence, but in situations where you as a Creator have a large number of users to add to the system and do not wish to use the Invitation function, email brainbot@bigger-brains.com to request a bulk import. Note: due to the security and privacy controls in the Teams, Slack, and Webex apps, even when a BrainBot user account is created in advance, each learner will have to follow a few easy steps to connect their BrainBot account to their Teams/Slack account on the first time they use it.
Signing Up as a Creator #
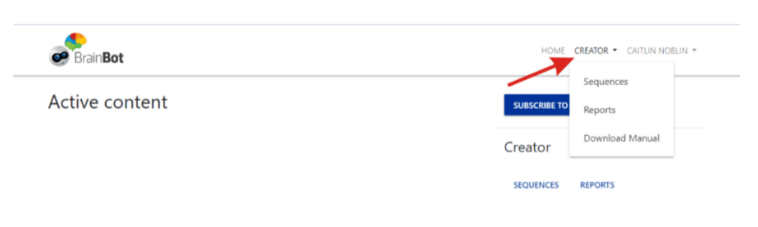
When you have purchased a Creator license, your BrainBot portal should show a new “Creator” menu after you login, which gives you the ability to add your own Sequences, run Reports and to Download a Manual. You should see this when you login to your account at www.brainbot.ai.
If you are a Creator and you do not see the Creator menu when you login at www.brainbot.ai, please contact brainbot@bigger-brains.com.
For information about purchasing a Creator account for yourself or your organization, please contact brainbot@bigger-brains.com.


