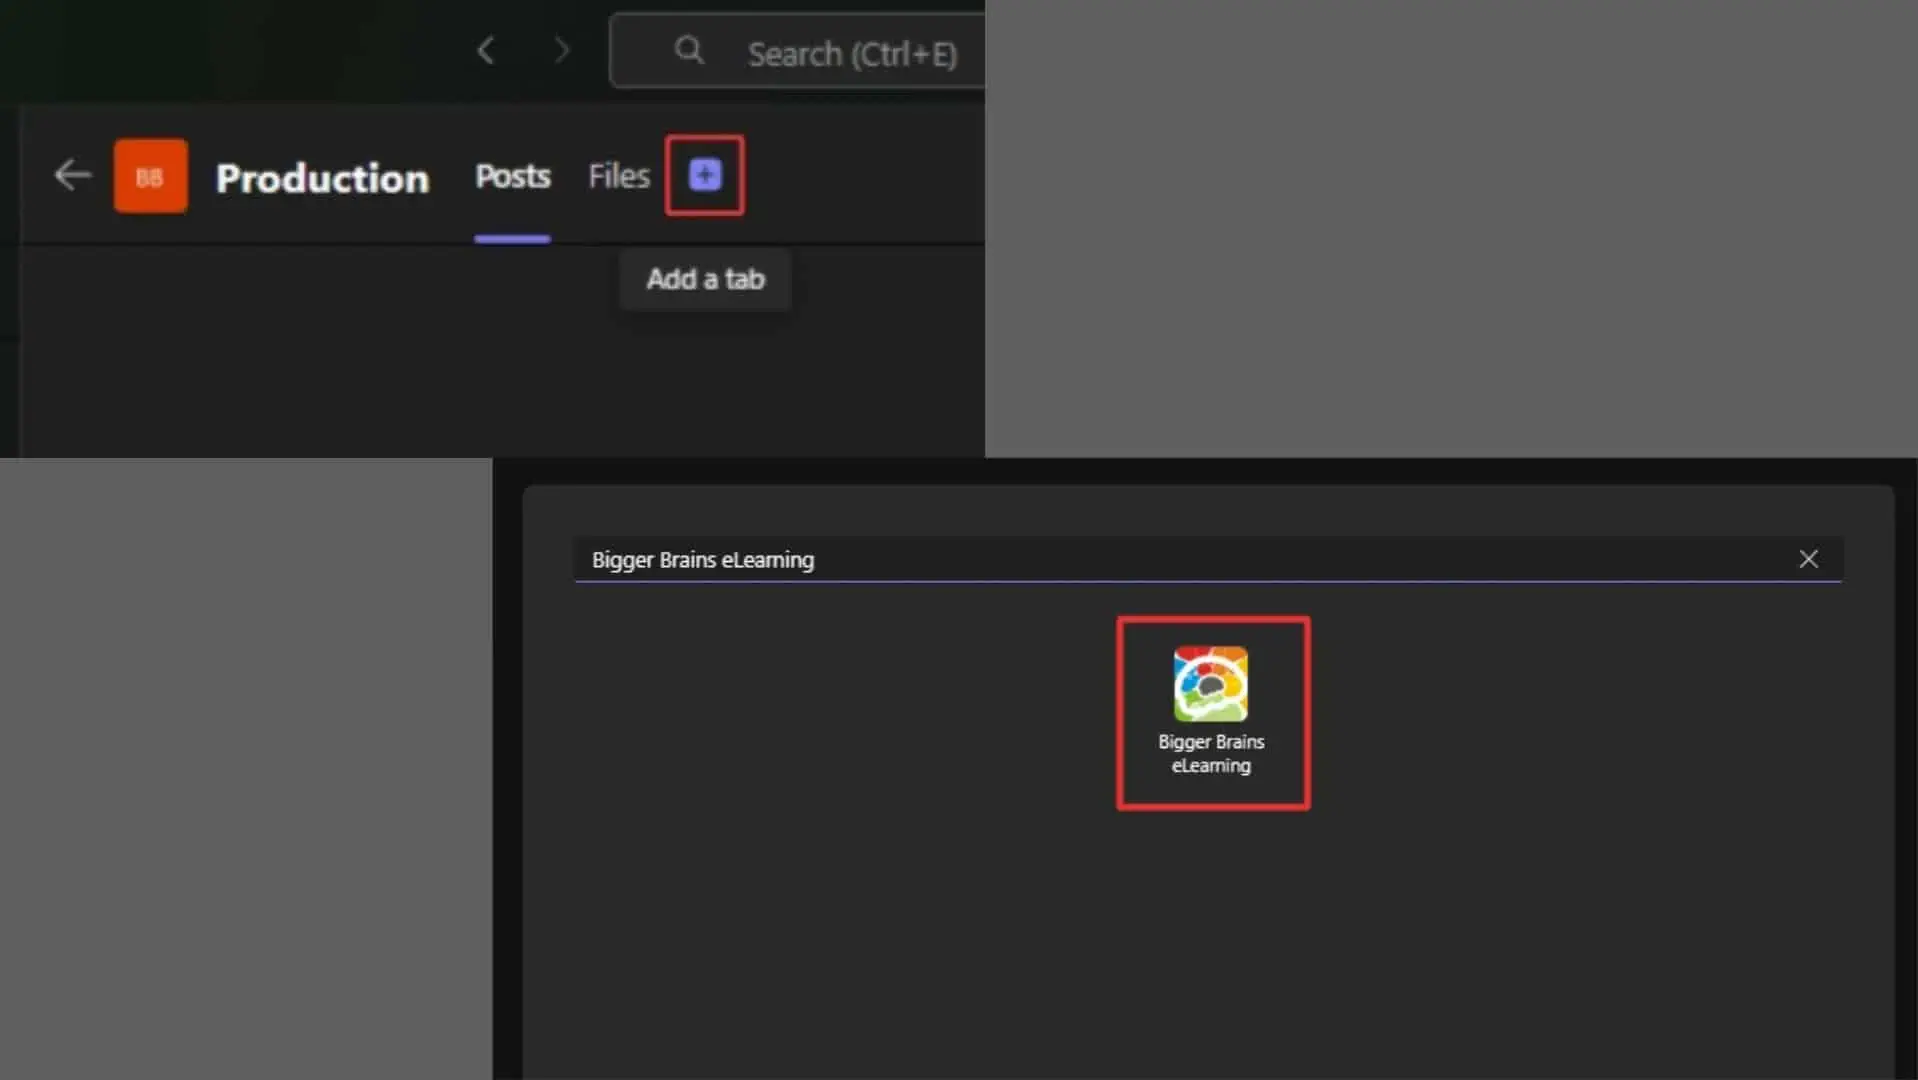
- In any Chat or Channel, add a new Tab by clicking the + icon.
- After clicking the + icon, search for ‘Bigger Brains eLearning’.
- If you don’t see ‘Bigger Brains eLearning’, go to the Teams App store and make sure the app is installed.
Which License Should You Choose? #
After adding a Tab, you will be asked to choose from one of three license types. The app will check your Microsoft User ID and recommend a license type if it finds your account in one of our systems.
- Use Individual Licenses:
- This license uses the individual’s Team ID (their email address, usually) to verify their license with the Bigger Brains Portal. If IT Service Providers have set up Users in the Bigger Brains Portal, they will be validated using this license type.
- Enter a new Corporate License ID:
- This license will prompt for a Corporate license ID. This will mainly be used by those who use our content in SCORM format. The Corporate license feature is used when the Bigger Brains content is being used from a Learning Management System (LMS) not from the Bigger Brains Portal.
- Use a Free License:
- As the name implies, this is a free license. Only a handful of sample courses are available with this license.

Please Remember:
For your clients, the choice between the ‘Individual’ or ‘Corporate’ license depends on how they access our content. The app will check their User ID and recommend a license type.
If you have setup each client as a User in our online Learning Portal, BrainStation, then your clients will access the app through the ‘Individual’ license. The system will then check the Portal to validate their individual username.
If your client uses our SCORM content in an LMS, you would choose the ‘Corporate’ license. To complete this process, you will need a Corporate license ID. You will enter the license ID in the app when prompted, and all Users in that organization will have access to the training content up to the limit allowed by that license key.
For IT Service Providers who access Bigger Brains content via DeskDirector or CloudRadial, you will also use the ‘Corporate’ license option, please contact Bigger Brains for a license ID.
Please contact support@bigger-brains.com if you do not have a license ID for a client.
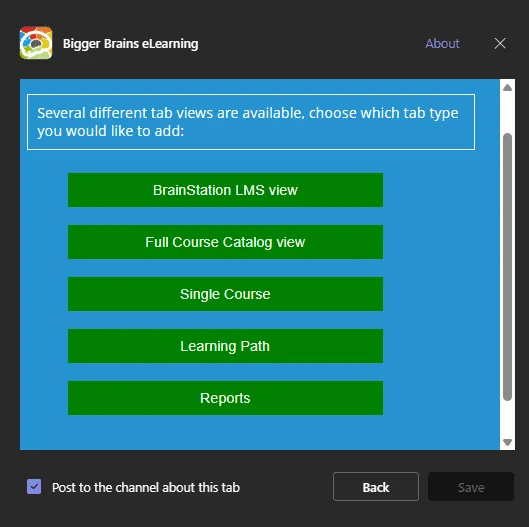
What Kind of Tab Options Are Available? #
- BrainStation LMS View:
- This Tab displays the Bigger Brains Learning Portal, BrainStation. It features the Bigger Brains course library and any custom content created by the Team Leaders for the organization.
- Full Course Catalog View:
- This Tab displays all available courses inside BrainStation. It is similar to the BrainStation view, except instead of starting from the ‘My Courses’ screen, it will start by displaying the entire Course Library View.
- Single Course View:
- This Tab displays only one selected course.
- Learning Path View:
- This Tab will show one Learning Path. A Learning Path is a collection of courses grouped in a specific order. When selected, this view will prompt you to choose an existing Learning Path or create a new one. Selecting ‘Existing Learning Path’ will display all created Learning Paths for you to choose from. Selecting ‘New Learning Path’ will prompt you to create a Learning Path from the Bigger Brains course library, or custom courses created by the Team Leaders for the organization.
- Reports:
- This Tab displays a reporting dashboard for the individual or for the Team. Team reporting is only available for Team Leaders.
After Selecting the View, Finish Creating the Tab: #
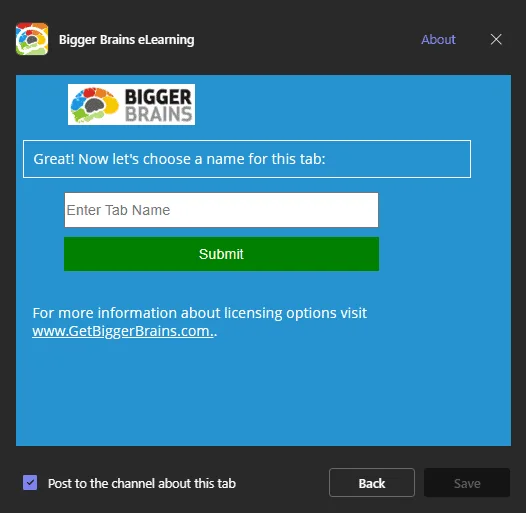
After selecting the view you would like to use, you will be asked to enter a name for the Tab. Enter the name and choose ‘Save’. If you select the Single Course type, you’ll be prompted to pick which course will display. After choosing the course, you will be asked to enter a name for the Tab.
Note: This can always be renamed later as well.