Disclaimer: We are currently in the process of migrating to a new UMS. While most functionality remains the same, updates are ongoing to ensure full functionality is available soon. If you have any questions about navigating the new UMS or completing activities within it, please contact our support team at support@bigger-brains.com for assistance.
Logging In #
Most Team Leaders will also have Learner access, meaning they will be able to take BrainStation courses as a Learner. Team Leaders with Learner access will simply log in as a Learner/User and their Team Leader functions will be available through their Home page (“My Courses”). See Learner/User Login below for instructions.
Some Team Leaders ONLY manage BrainStation accounts for others and do NOT have learner access to courses. If you do not have Learner/User access, see Other Login Types below for instructions.
Learner/User Login #
The Learner/User Login is accessible from getbiggerbrains.com or any of our reseller partner sites. If you access Bigger Brains through a reseller, follow their instructions for getting to the Bigger Brains Login screen.
From getbiggerbrains.com:
- Click the green Login button in the upper right-hand corner of the website homepage.

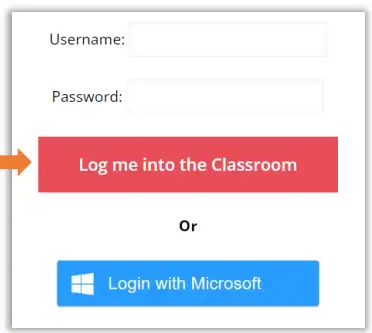
At the Bigger Brains login screen:
- Enter your provided credentials.
- Choose “Log me into the Classroom” OR
- To log in with your Microsoft 365 (Azure AD) credentials select “Login with Microsoft”
Other Login Types #
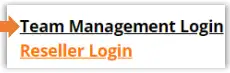
If you ONLY manage BrainStation accounts for others and do NOT have Learner access to courses, login using a special login link – look for it under the normal user login:
You can also find it here: https://www.bigger-brains.com/secure/organizations/Default.aspx
Once you log in, you will be taken to the Team Management portal.
Resellers will select the “Reseller Login.” Instructions for Resellers can be found here: Below
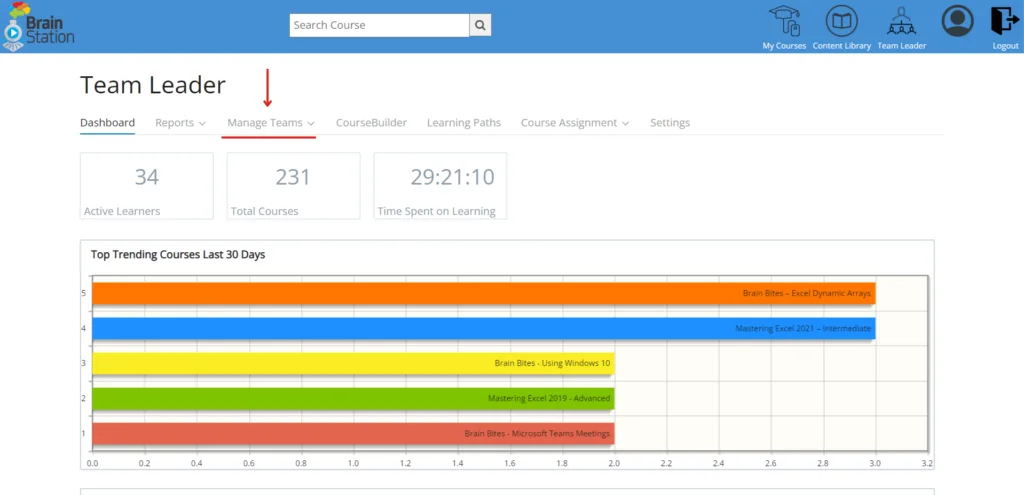
Team Dashboard #
After choosing the Team Leader icon from the My Courses page, you will go to the Team Leader Dashboard which displays the Report page. Choose Manage Team from the left menu to go to the Team Management Portal.
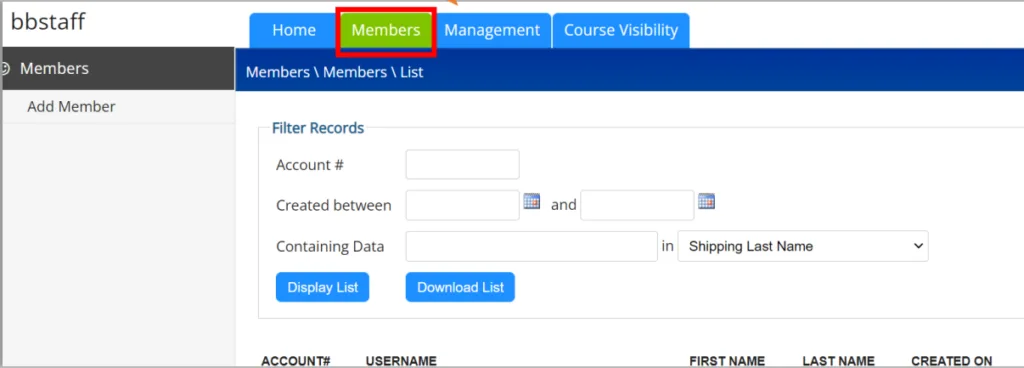
Members Tab #
Select the Members tab to go to the Members page. This view, indicated by the Members tab highlighted in green, lists information about the users on your team.
Note: Deleting a user account means they may no longer show up in reporting.
(If you receive an error that no licenses are available, go back to your Home tab and use the Buy Licenses link to purchase user licenses, or contact your Bigger Brains representative).
Add Member #
Choose Add Member from the left-hand menu.
This is where you enter information to create a new member. Notice that most of the fields are optional except names, email, username, and password.
We generally recommend using the person’s email as their username to make it easy for them to remember, but this is not required.
Important: Our system will NOT email the user. YOU must notify each new member with thier username and password.

Bulk Upload Members (Azure Active Directory Upload) #

Within the Add Member feature, you can select the Azure Active Directory button to import users using the Active Directory Application you created. To view how to create this please view our documentation on Importing Active Directory Applications.
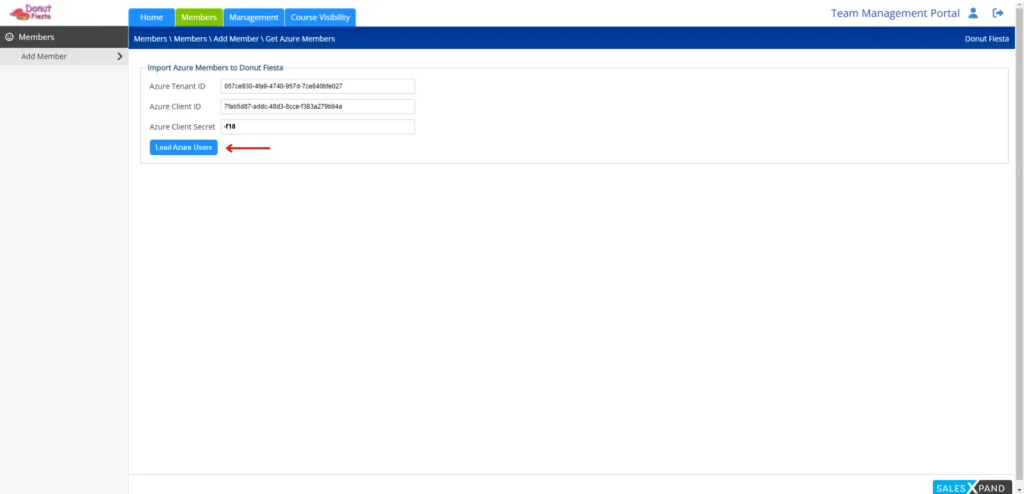
Within Azure you should have received a Tenant ID, Client ID, and Azure Client Secret. You will use this information to load your Azure users. Please hold onto your Azure Client Secret key as this isn’t saved within the Azure Application anywhere.
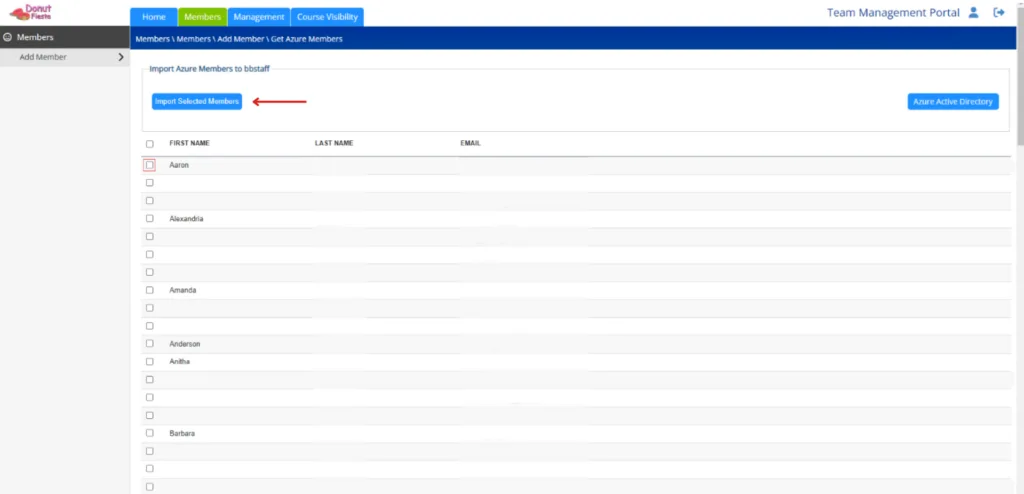
If the information above is correct and matches our records search for your application, then your Azure members should populate, and you can then select which users to upload by checking the box on the left of your screen and selecting Import Selected Members.
Bulk Upload Members (CSV Upload) #
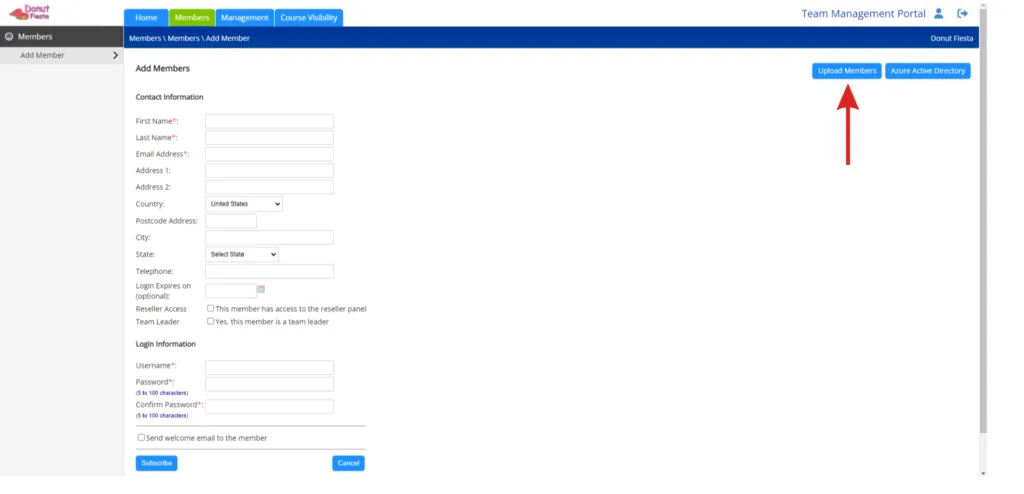
To upload bulk members, you first select the Upload Members button as shown above.
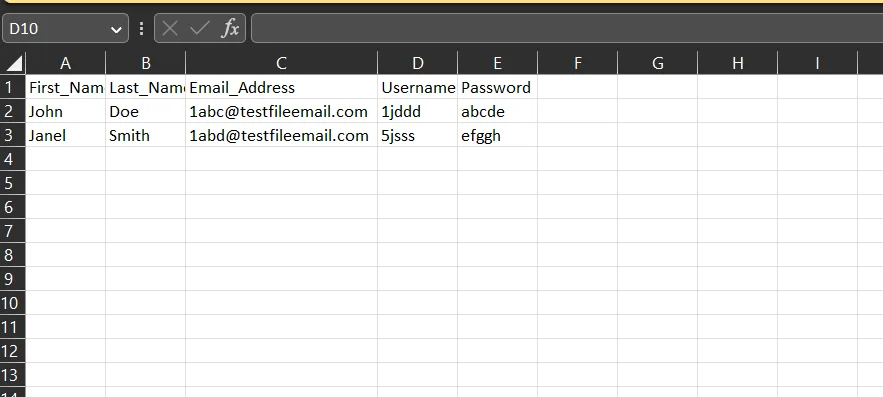
Above is an example of a sample bulk upload using csv, the csv file needs five categories including First_Name, Last_Name, Email_Address, Username, and Password. The Username and Password are just the starting password for the user, and this can be changed later.
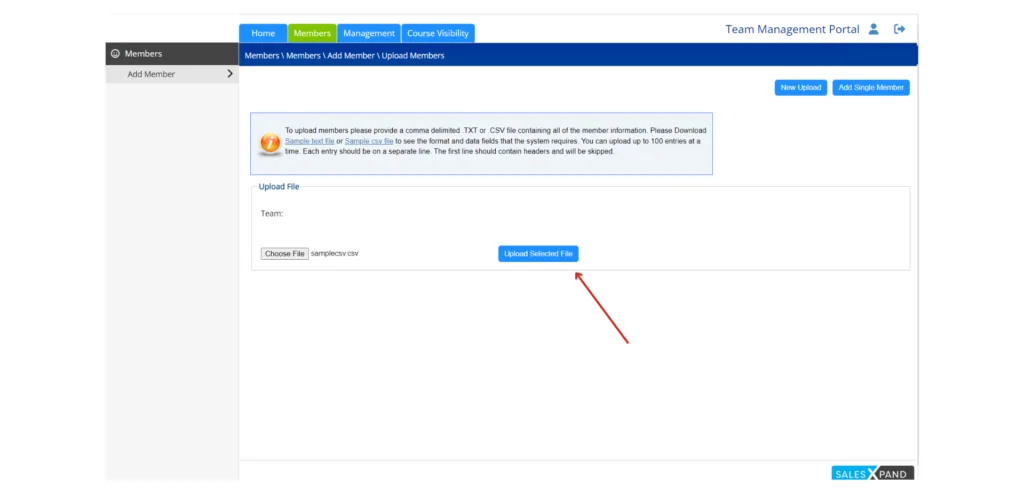
Once you have your csv selected choose the Upload Selected File button to complete your upload.

Your upload will show the users in the csv if uploaded correctly, if the email is already in use this will show in the status view. If you would like to add additional members simply click the Add Single Member button, and for another bulk upload click the New Upload button.
Edit Member #
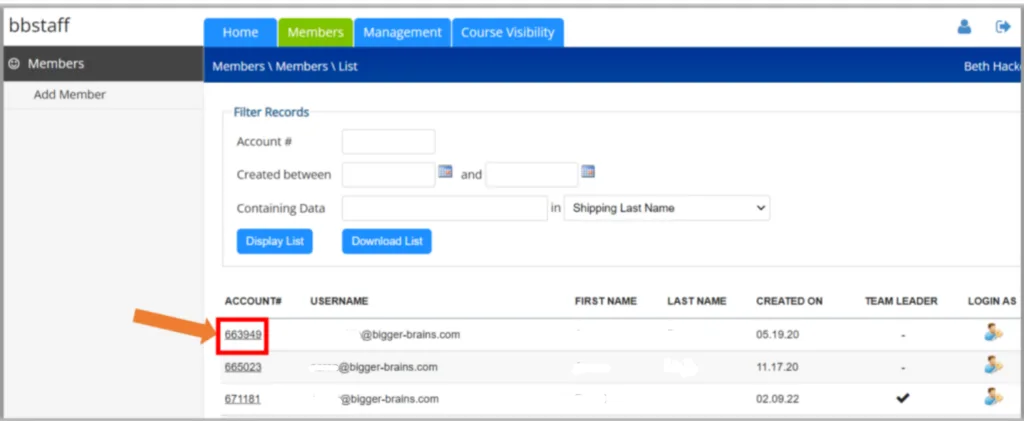
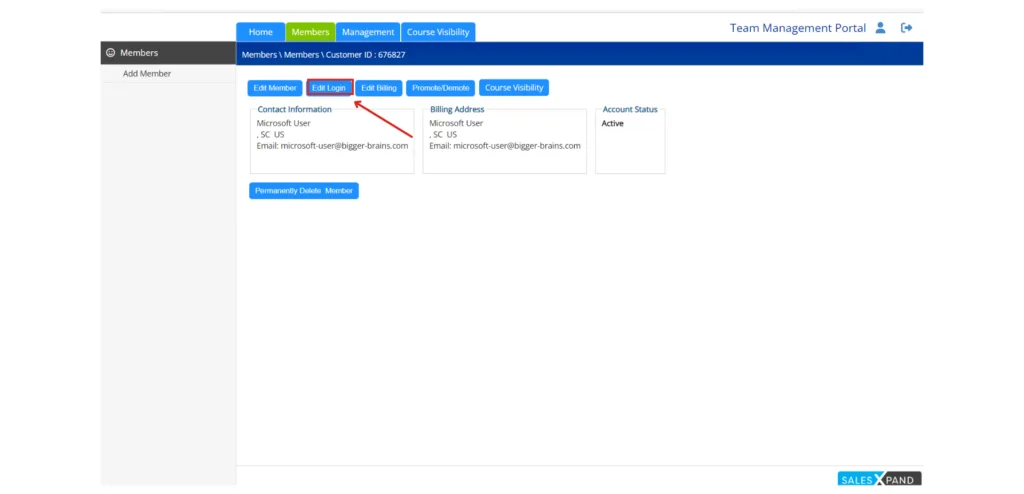
After a user is created in your Team Management portal, you can edit that user by clicking on their account number in the Members List as shown below:
Change a Member’s Email #
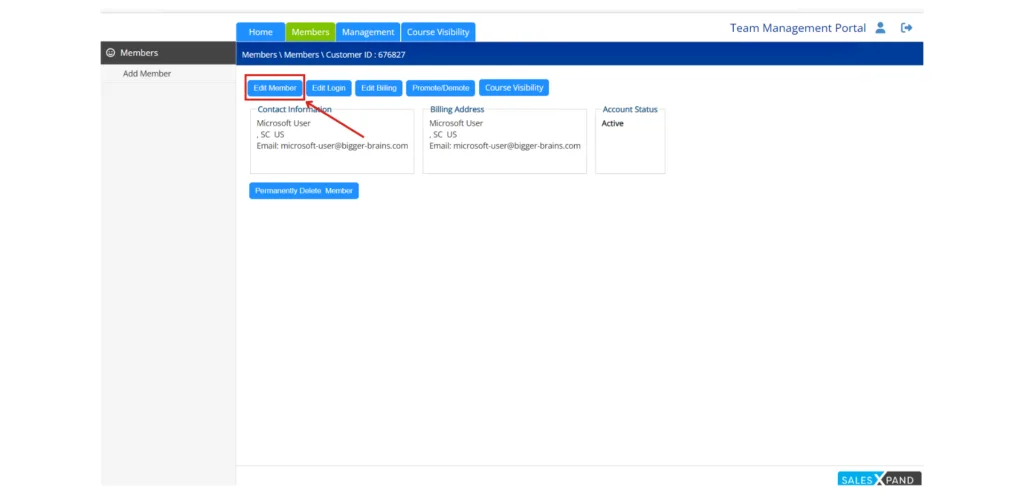
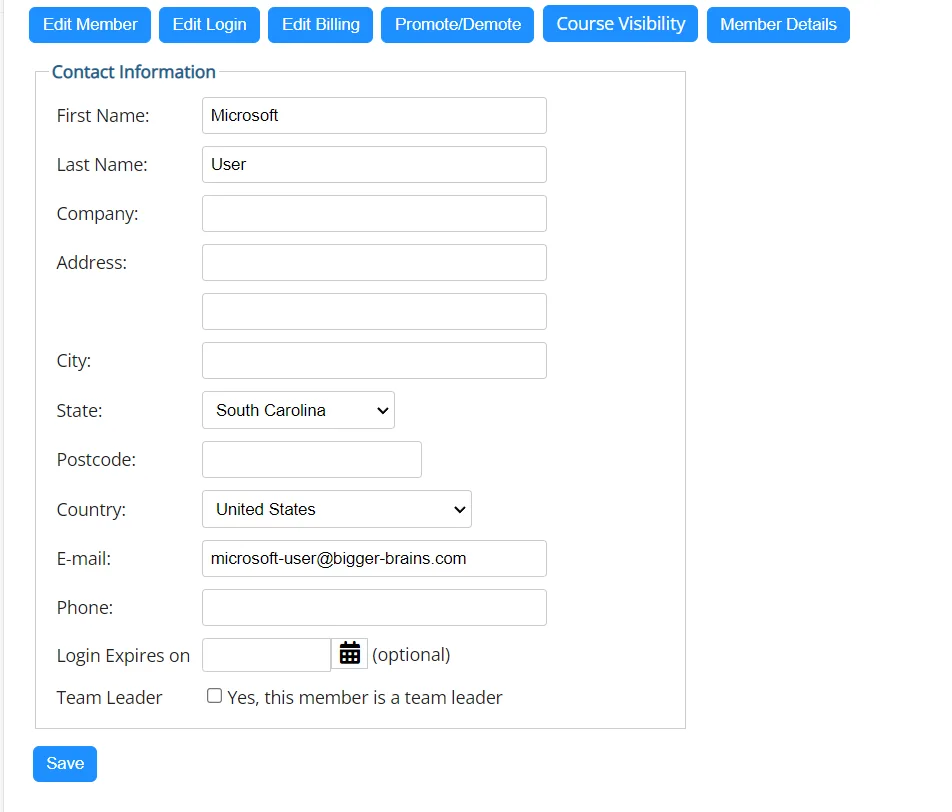
To change a member’s email, you click the Edit Member button.
From the Edit Member page, you will be prompted to enter the following information, you can edit a member’s email, phone number, company, address, and login expiration date. Please be sure to select the Save button for this information to populate properly.
Reset a Member’s Password #
To reset a member’s password, select the Edit Login button.
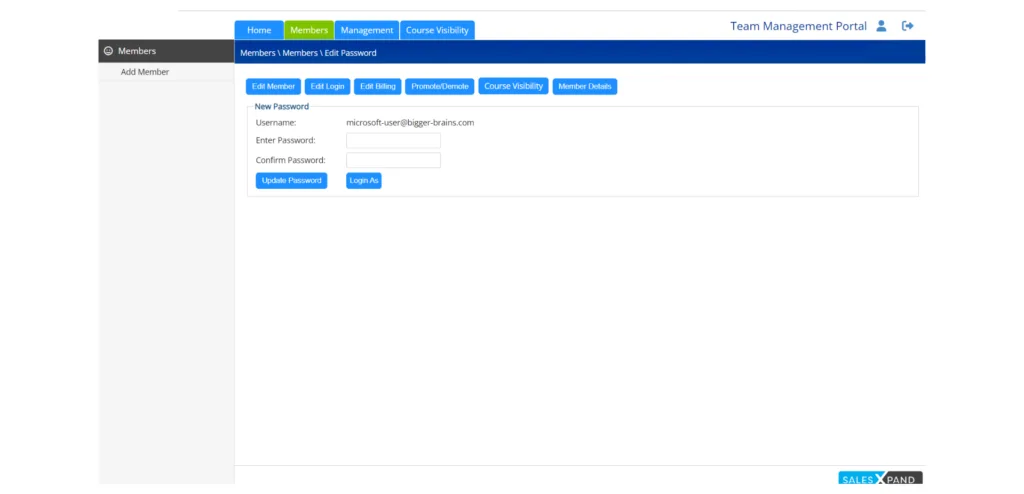
You can update the password by entering the new password field. From there you can either choose to login as that user, or just simply update the password and send them the credentials needed.
Promote a Member to Team Leader #
In addition to editing the user’s information and password (the username cannot be edited), you’ll notice a Promote/Demote button:

To promote a user account to the Team Leader functions, check the box AND then click Update Status


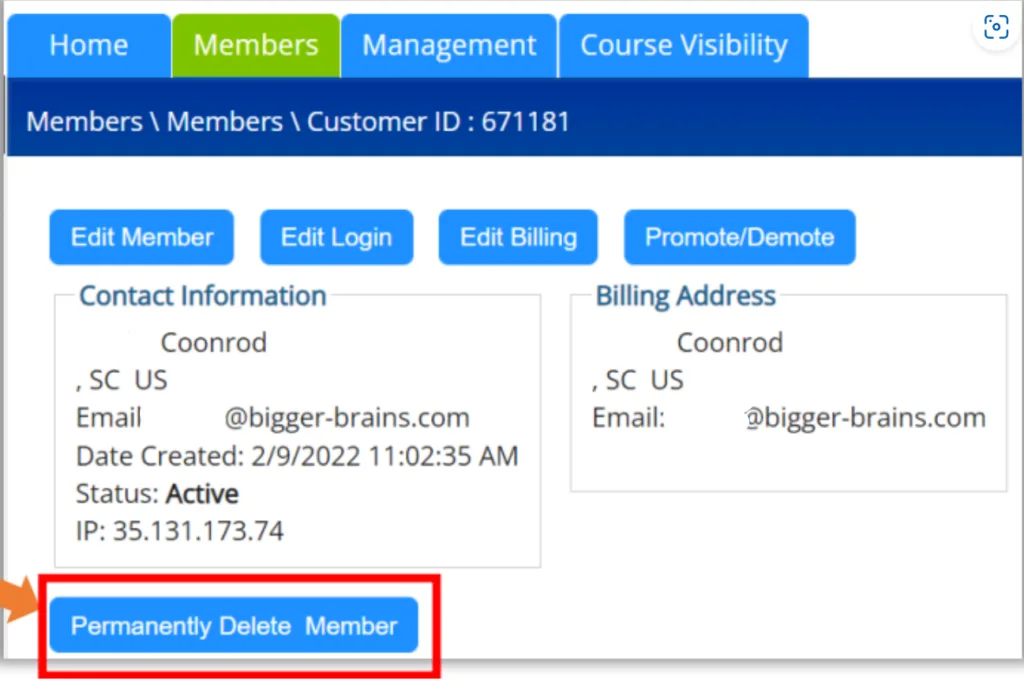
Delete Member #
Also note that from the edit member screen you can delete a member by clicking the Permanently Delete Member button:
THIS CANNOT BE UNDONE! Please use carefully. Also note that deleted members will no longer show up in usage reports.