Disclaimer: We are currently in the process of migrating to a new UMS. While most functionality remains the same, updates are ongoing to ensure full functionality is available soon. If you have any questions about navigating the new UMS or completing activities within it, please contact our support team at support@bigger-brains.com for assistance.
What you would refer to as a ‘Client’ the Reseller Portal would recognize as a ‘Team’. To add a client to the Reseller Portal, you must create a Team for them.
How to Create a Team: #
- Log in to the Reseller Portal.
- Select ‘Teams’ from the menu on the left of the screen.

- Click ‘Create New’ from the top right corner of the page.

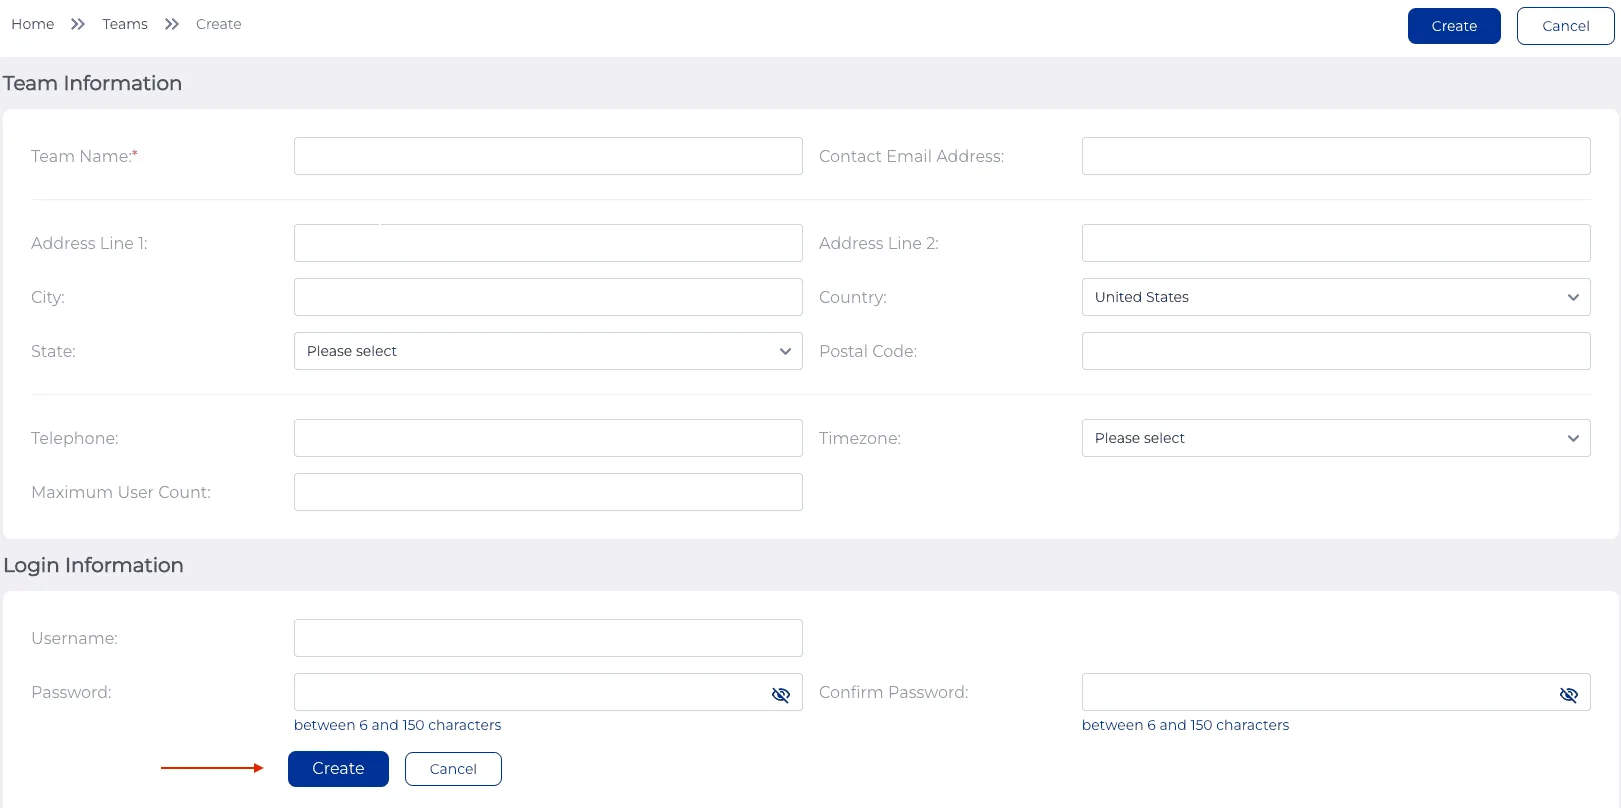
- Fill out the ‘Create New Team’ form.
- When complete, click ‘Create’ at the bottom of the form.
- The new Team will appear in the Teams tab.

How to Add Users to a Team: #
You can add Users to a Team from the Team Management Portal.
- Enter the Team Management Portal by clicking the ‘Login’ button for the Team where you want to add Users.

- Select ‘Members’ from the menu on the left side of the screen.
- From the drop-down list, select ‘List’.
Special Note: The ‘Upload’ option located under ‘List’ will allow you to upload a CSV or Text file with multiple Users.

- Select ‘Create New’ from the top right corner of the screen.

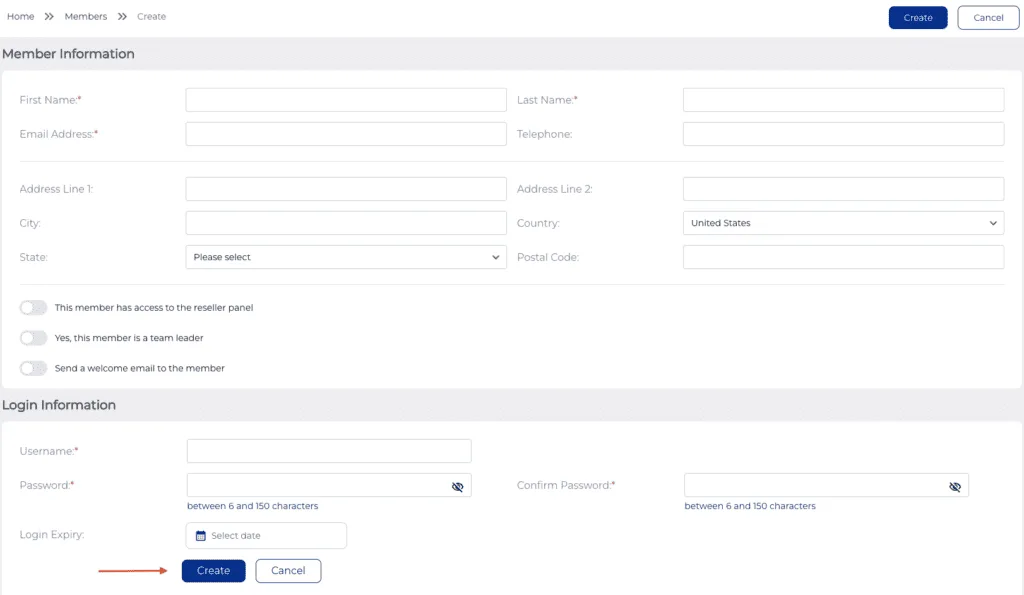
- Fill out the ‘Create New User’ form.
- Select ‘Create’ at the bottom of the form when complete.
- If there are any errors, a message will display.
- You will be returned to the ‘List’ page when a new User is added.

You can set an expiration date for the User account with the ‘Login Expiry’ field. This is useful if you sell someone a 1-year subscription. On the expiration date, the User will lose access to the classroom until you delete or change the expiration date. (Expired Users still count against your User limit.)

How to Edit a Team: #
- Enter the Reseller Portal.
- Go to the ‘Teams’ tab.
- Click the three-dot icon under ‘Action’ next to the Team you want to edit.
- Select ‘Edit’ from the list of options.

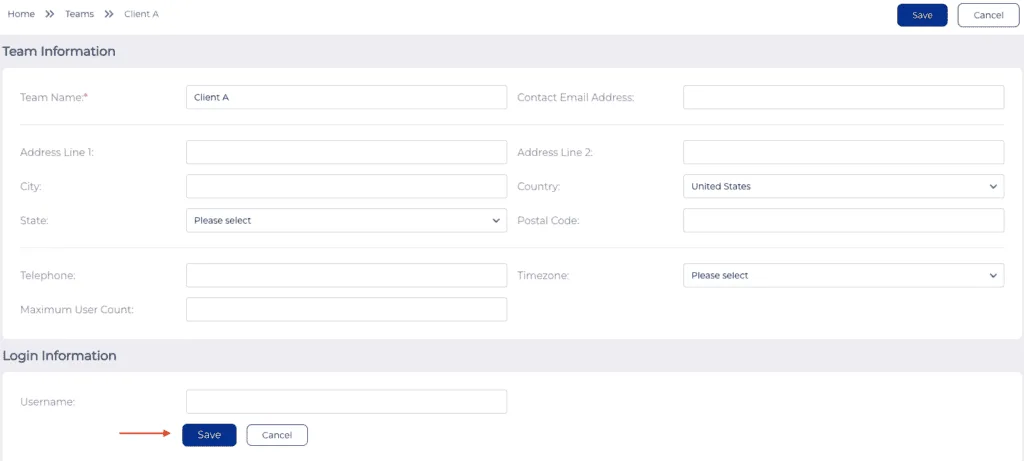
- From here you can edit the Team information.
- Select ‘Save’ when you are finished editing the Team.

How to Reset a Team’s Password: #
- Log in to the Reseller Portal.
- Go to the ‘Teams’ tab.
- Click the three-dot icon under ‘Action’ next to the Team you want to edit.
- Select ‘Password Reset’ from the list of options.

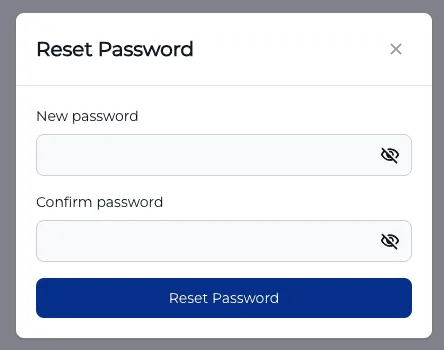
- Enter a new password.
- Confirm the password.
- Select ‘Reset Password’.

How to Delete a Team: #
Currently, Teams cannot be deleted. They can be renamed and the Users in a Team can be deleted. Please see the Disclaimer at the top of this page as it relates to this feature being temporarily missing.


