
- Overview:
- Prerequisites:
- 1. Create an Enterprise Application
- 2. App Registration
- 3. Add a Scope
- 4. Add a Client Application
- 5. Add a Client Secret
- 6. Importing Users Into the Team Management Portal
- Another Method to Compete Steps 1-5:
- 1. Automate the Process with PowerShell Scripts
- 1. Download this PowerShell script and save to your hard drive in an easy-to-remember path.
- 2. Run PowerShell on your Windows computer. For PowerShell on other platforms, see this page.
- 3. Because this script is unsigned, you likely need to set the PowerShell Execution Policy to run unsigned apps.
- 4. Run the script by typing the path and file name.
- 5. The script will now run. Note there may be long pauses as the script downloads and installs PowerShell modules for Microsoft Graph and Azure AD cmdlets. You may see notifications that these items are being installed.
- 6. When prompted, enter a name for your App. The actual name is not important, we recommend something descriptive like “Bigger Brains Azure Import App”.
- 7. The script will try to detect your Azure tenant ID if you are logged in. If a tenant ID is detected, it will prompt you to confirm the tenant ID. If it is unable to find a tenant ID, it will prompt you for yours.
- 8. The script will continue running after the tenant ID is entered. Various progress or error messages may appear.
- 9. When the script completes successfully, you will find the three key credentials needed for the Azure AD Import (Entra ID Import) displayed in green:
- 10. At this point the script is completed and PowerShell may be closed (after you copy those credentials!) and you can proceed with step 6 in this Guide.
- 1. Automate the Process with PowerShell Scripts
Instructions to Import Users from your Entra ID to Bigger Brains Portal.
Bigger Brains can import users from your existing Entra ID with just a few clicks!
Note: PowerShell scripts to automate this process are available, see “Another Method to Complete Steps 1-5”
To view the Entra ID Import Guide, click here.
Overview: #
- An Enterprise Application should be configured in your subscription.
- The Enterprise Application should be configured to expose the Entra ID endpoint, and necessary permissions to read the user data should be set.
- Using the Tenant ID, Client ID, and Secret, we establish a secure connection from our application to your configured enterprise application to read and import the users.
- All Users will not be automatically imported. We allow you to select the users to import before applying the import.
- eturn to the import page anytime to add new users (your tenant credentials are saved).
Prerequisites: #
- Someone with a Global Administrator account or Privilege Role Administrator account.
- Entra ID user list.
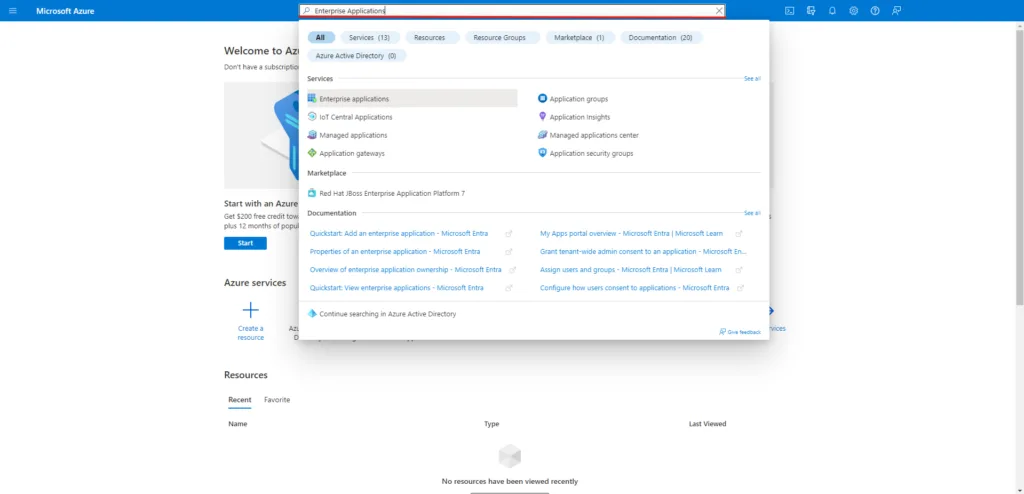
1. Create an Enterprise Application #
Start by logging into the Entra portal. Once you have logged in, click into the search bar and search for Enterprise Applications as seen below.
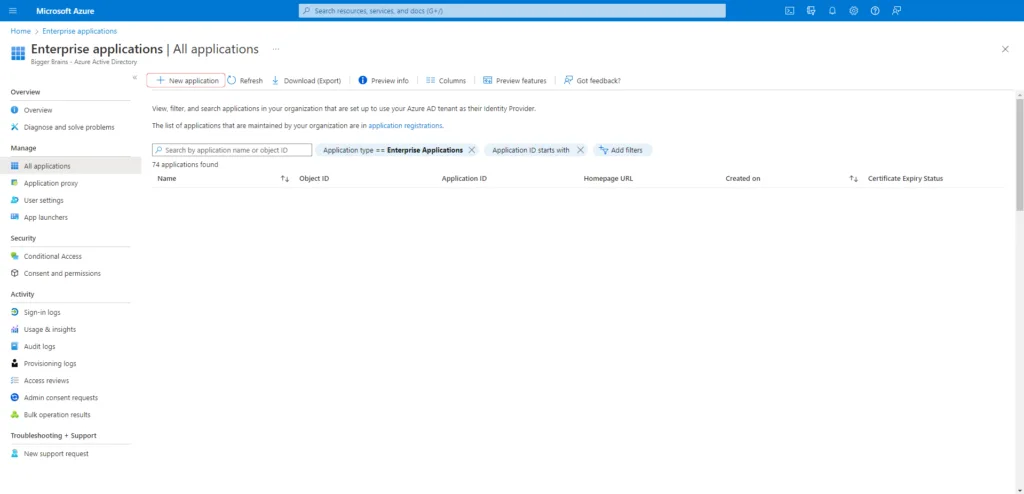
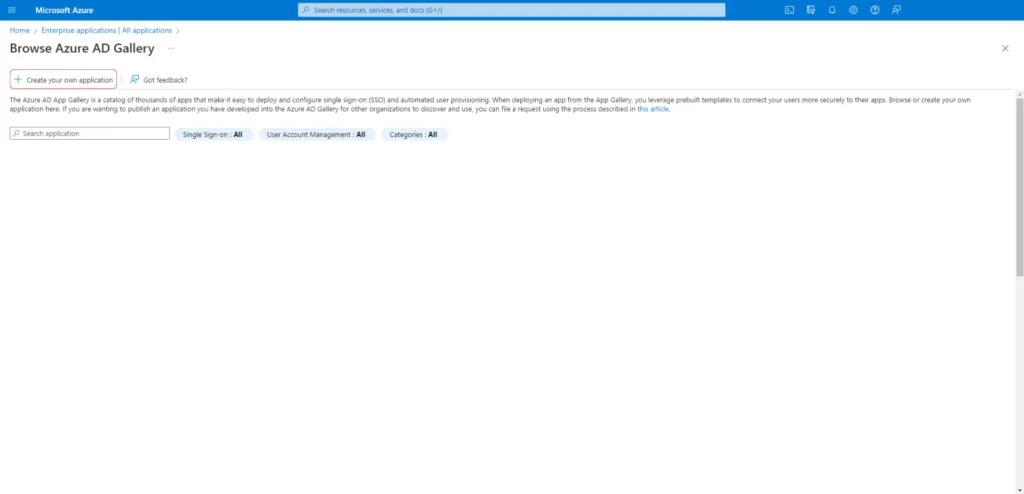
In your Entra portal, create an enterprise application by selecting New Application and then Create your own Application.
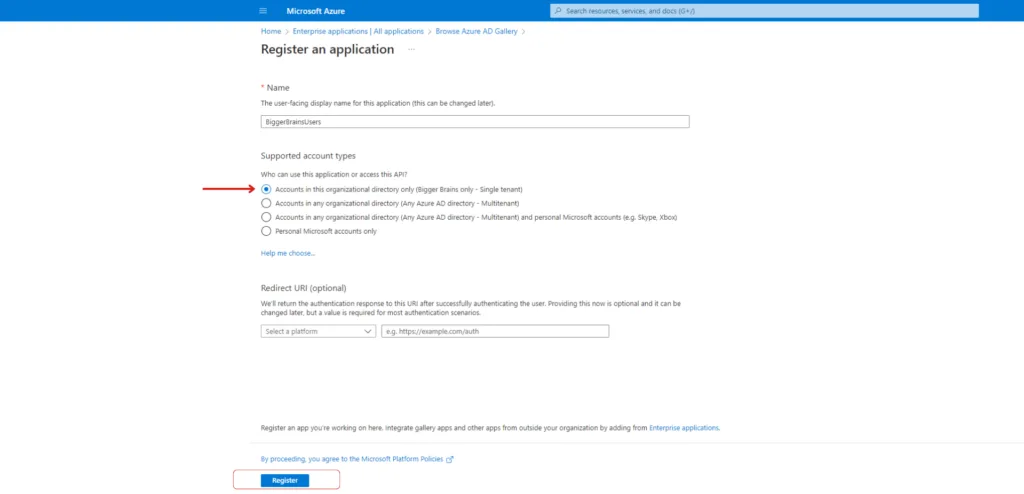
You can give the application a name of your choice, but for easy reference, let’s call it BiggerBrainsUsers. Select Register an application to integrate with Azure AD (App you’re developing).
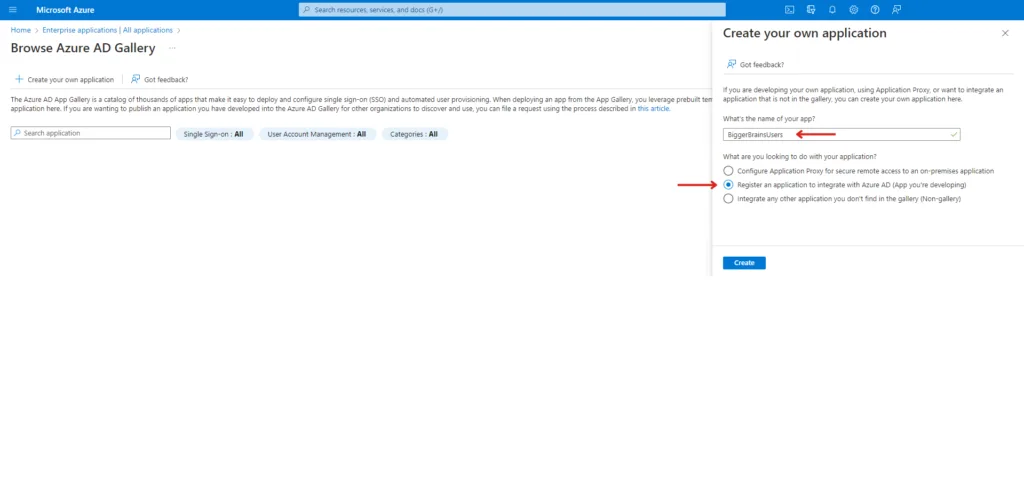
Protect access to this application to be within the account by choosing the option Accounts in this organizational directory only (single tenant). After complete of the configuration, you will be provided with the required tokens/ IDs to authenticate and access it from outside the account.
You do not need to change anything in the Redirect URI section of this page. Once you have made the proper actions, click the Register button from the bottom left corner.
The above three steps created an Enterprise Application, and we now need to configure it to say what this application should do. In Entra terms, this is known as App Registration.
2. App Registration #
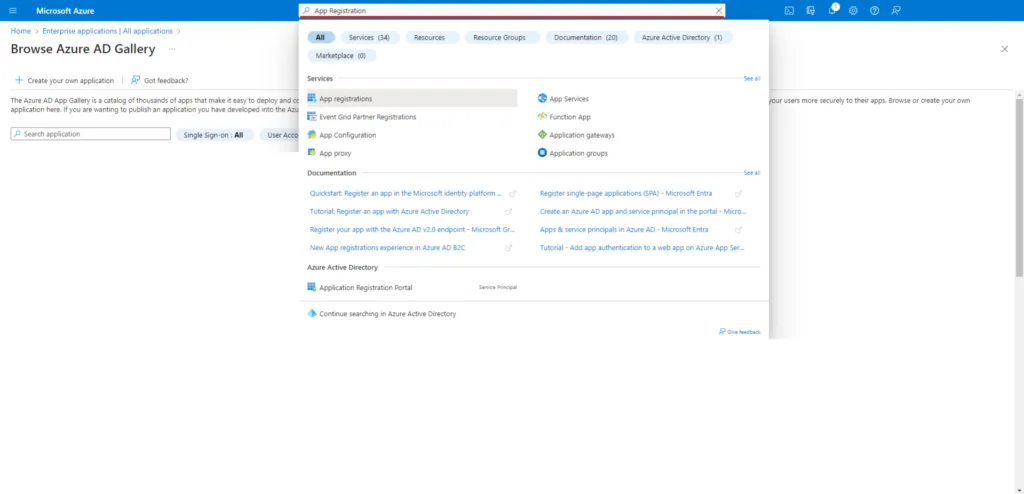
In the search bar at the top of the screen, search for App Registration as seen below. Click on App registrations from the search menu.
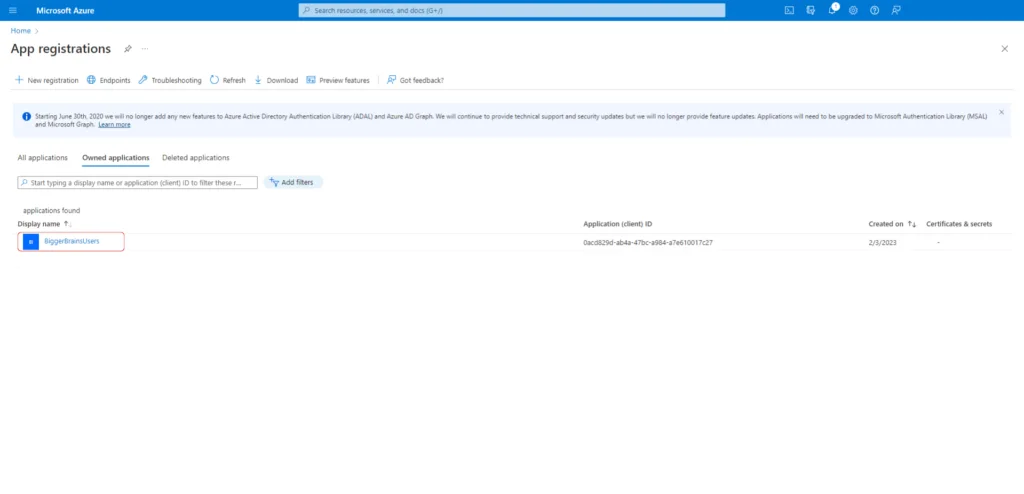
From the App registrations page, you should be able to see the application, BiggerBrainsUsers, under the Owned Applications tab.
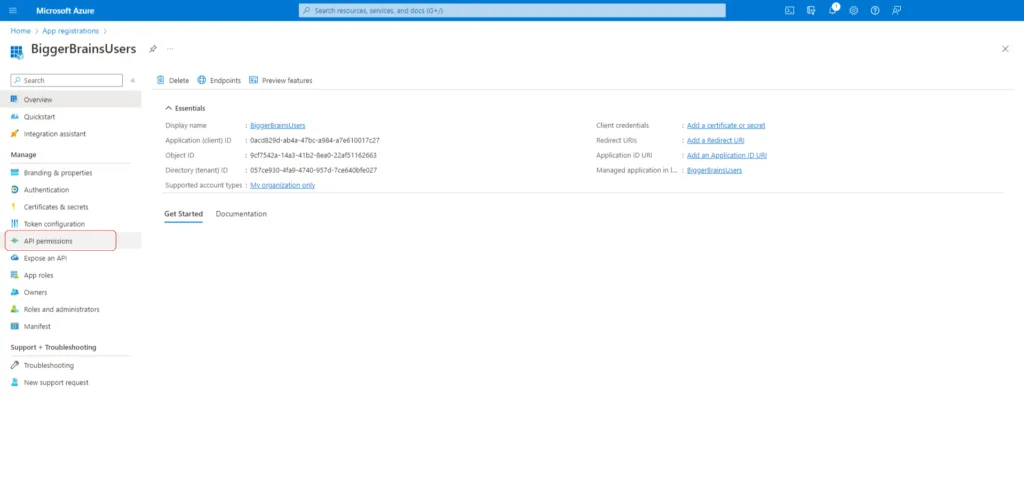
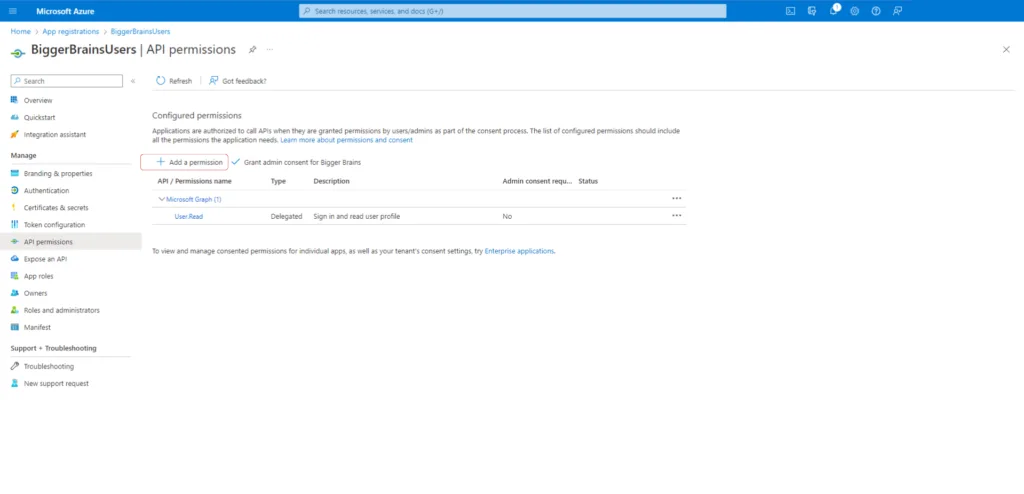
Select the application and click on API Permissions from the Manage menu on the left side of the screen. Here, we can choose the access level this application will have.
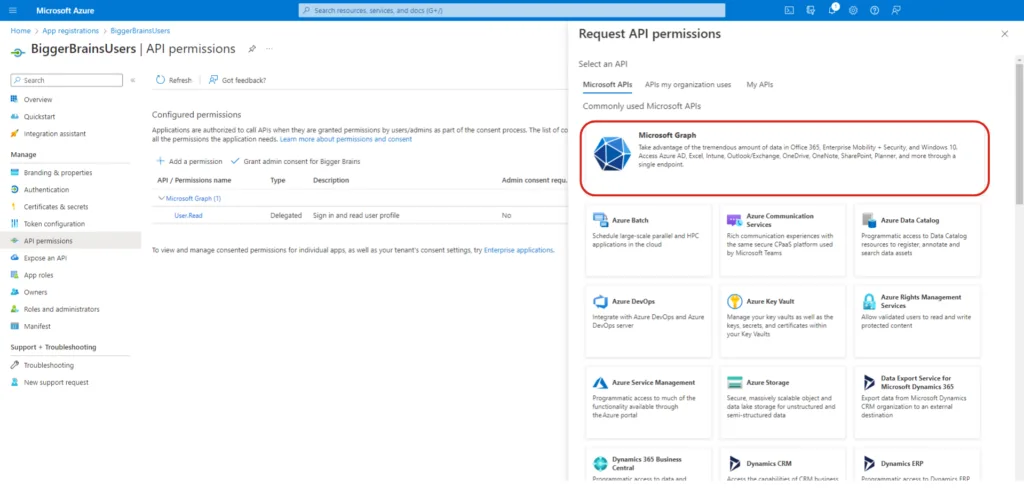
To choose and add permissions, click on Add a permission, and from the pop out screen, select Microsoft Graph.
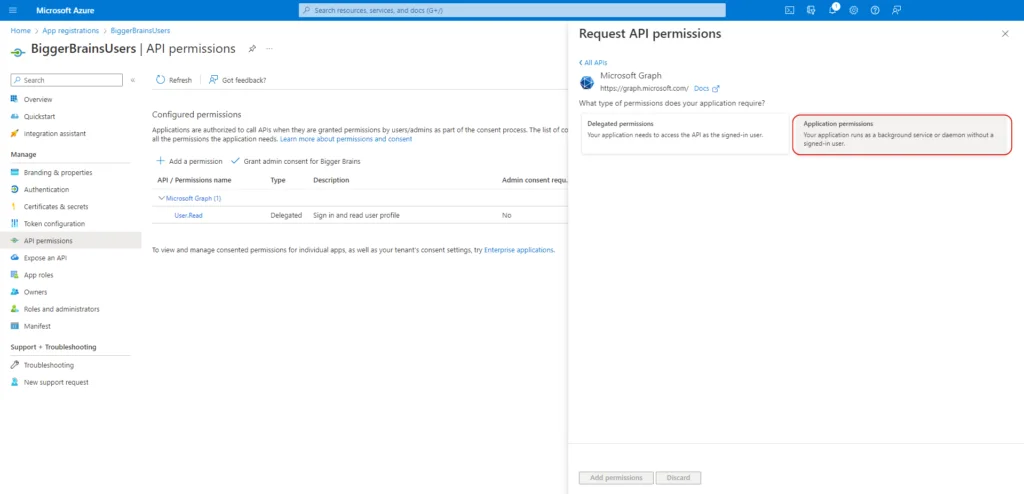
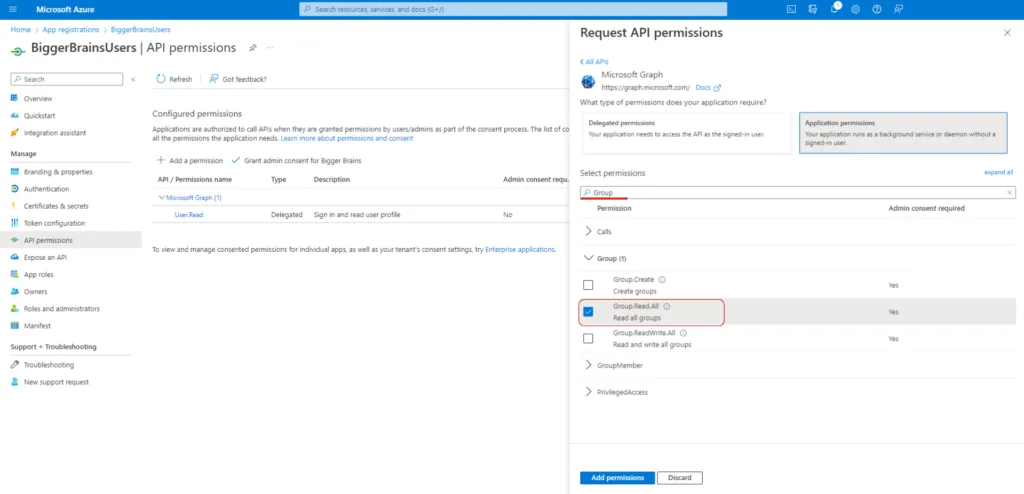
In the next screen choose Application permissions.
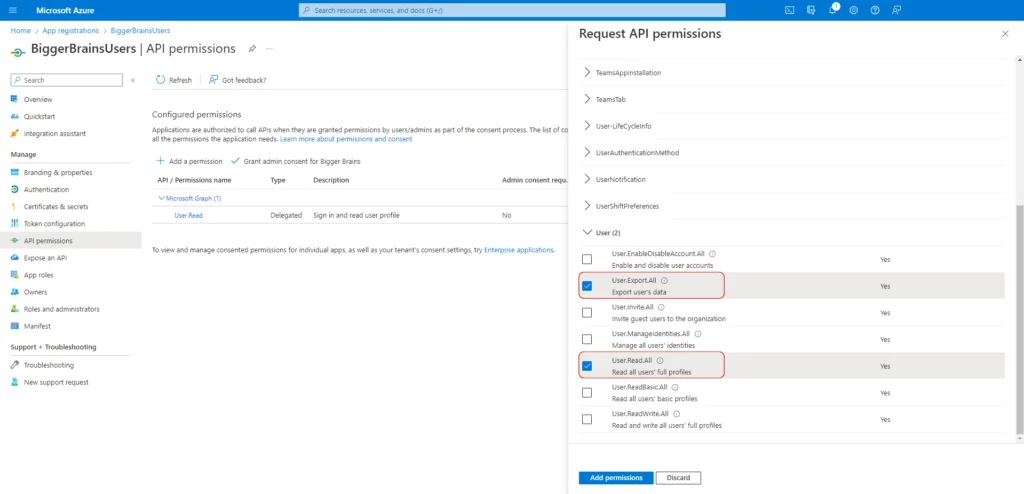
In the Select Permissions list that appears, search for User in the search bar. Then open the drop down list under the title User to select the options below.
- User.Read.All – This will permit the application to read all user information.
- User.Export.All – This will permit the application to export all user information.
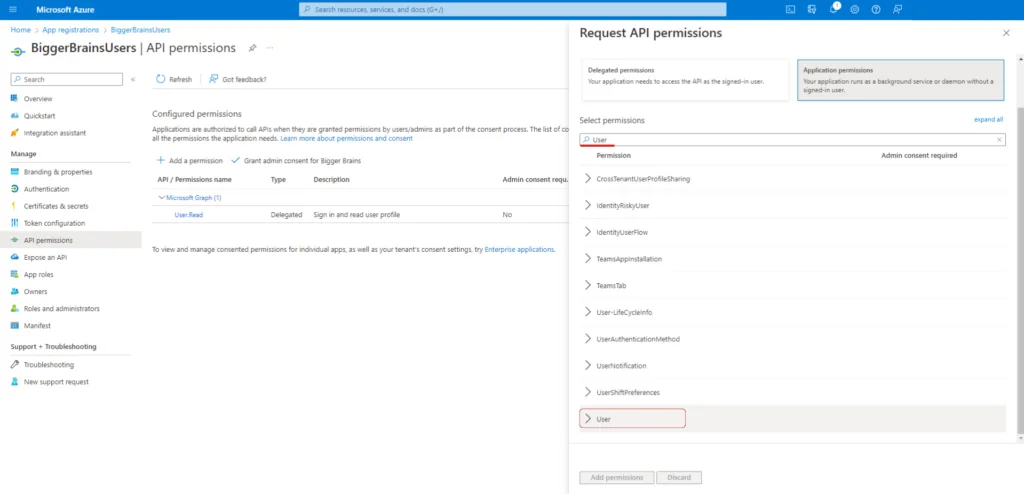
Similarly, we need to allow access to Group information by searching for Group in the search bar. Open the drop down list under the tile Group and select Group.Read.All.
Finally, we will also need Group Members information, and to enable the access search for GroupMember and select GroupMember.Read.All. When complete, click the App Permissions button to add all the previously selected permissions to this application.

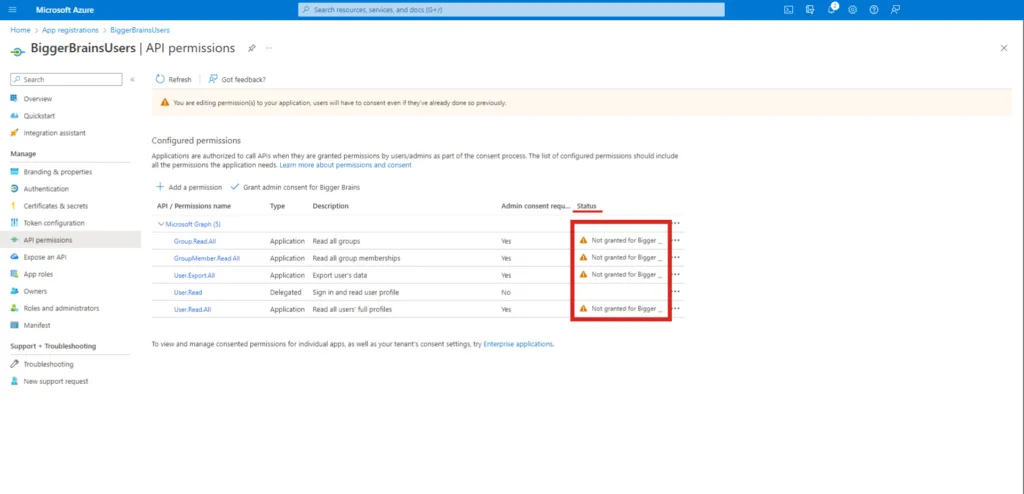
Ensure the application can access the configured permissions by checking the status column. As highlighted below, you may see a warning message indicating that consent is needed to grant access.
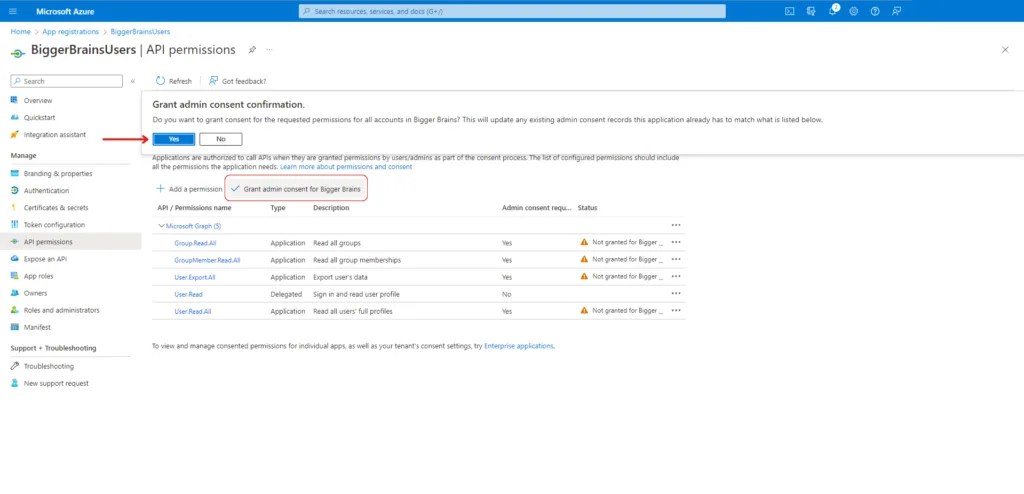
To Grant Access you can click on Grant admin consent for <Application Name> (<Application Name> is the placeholder here). A pop-up box will ask for confirmation of this action. Select Yes. Upon granting access, the status should change and inform you that access has been granted for Bigger Brains.
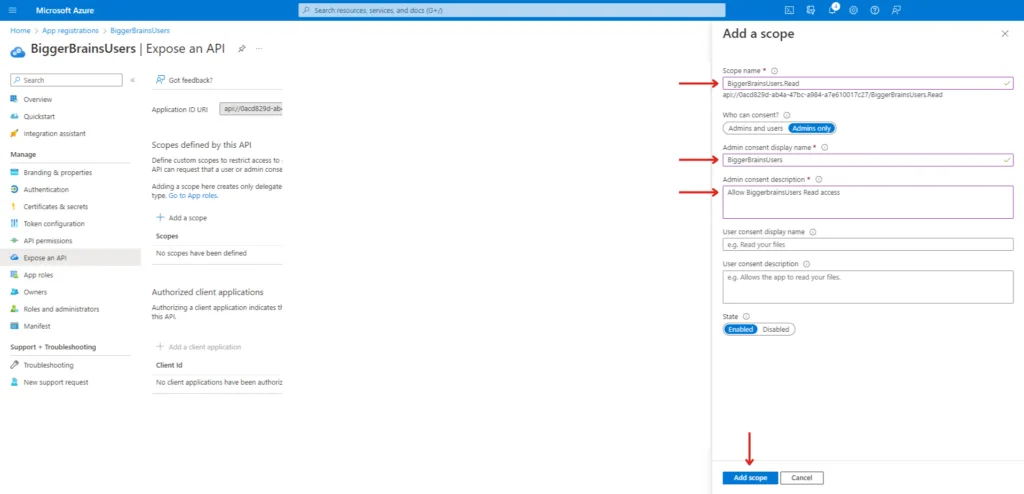
3. Add a Scope #
We now need to add a scope to restrict access to data and functionality protected by the API. Click on Expose an API from the Manage menu in the left sidebar. Further, click on Add a Scope. You will be presented with an Application ID URI from a popout menu. Select Save and Continue and proceed.

Give the scope a name, as programmatically this name will be presented to the client internally. For easier reference, you can use BiggerBrainsUsers.Read as scope name, BiggerBrainsUsers as Admin consent display name, and Allow BiggerBrainsUsers Read access as Admin consent description. Select Add scope to enable these restrictions.
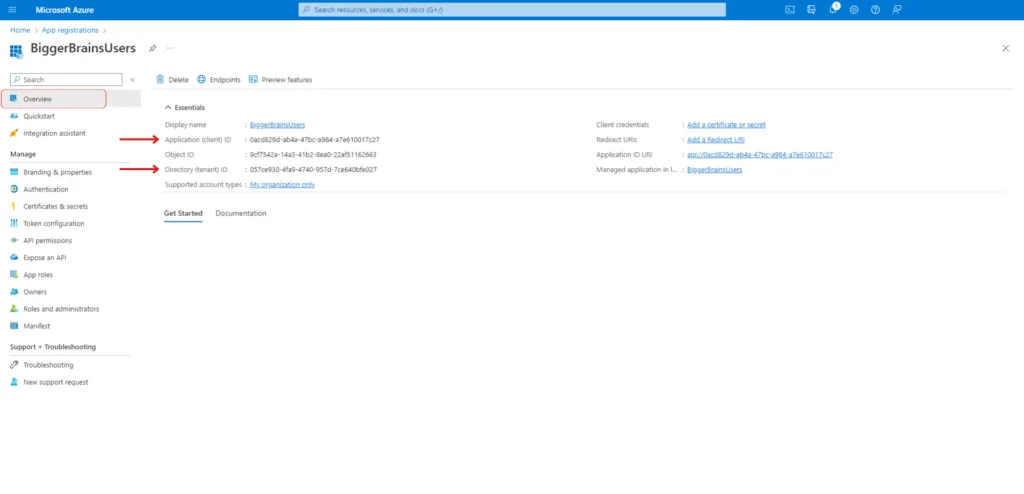
We are now almost ready with the configuration. To make things work, we need to know the ID of the application which can be obtained from the Overview tab in the left sidebar menu.
The Overview tab can be found below the search box in the left sidebar menu. Make a note of the Application (client) ID, and Directory (tenant) ID as these will be important later. You can copy these items to your clipboard by hovering your cursor over the information until a Copy to Clipboard options pops up.
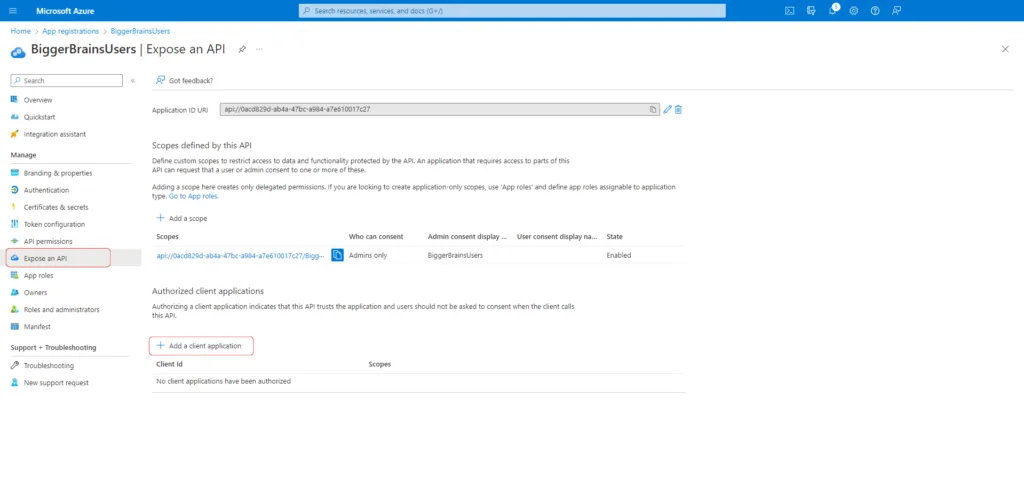
4. Add a Client Application #
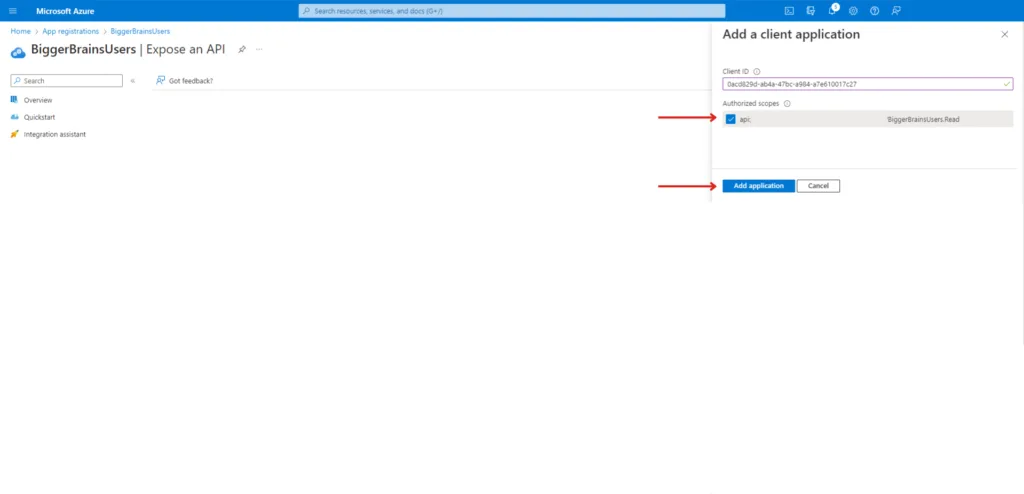
Click on Expose an API from the Manage menu in the left sidebar and click on Add a client Application.
Paste the Application (client) ID copied in the previous step and select the Authorized scope. Select Add Application.
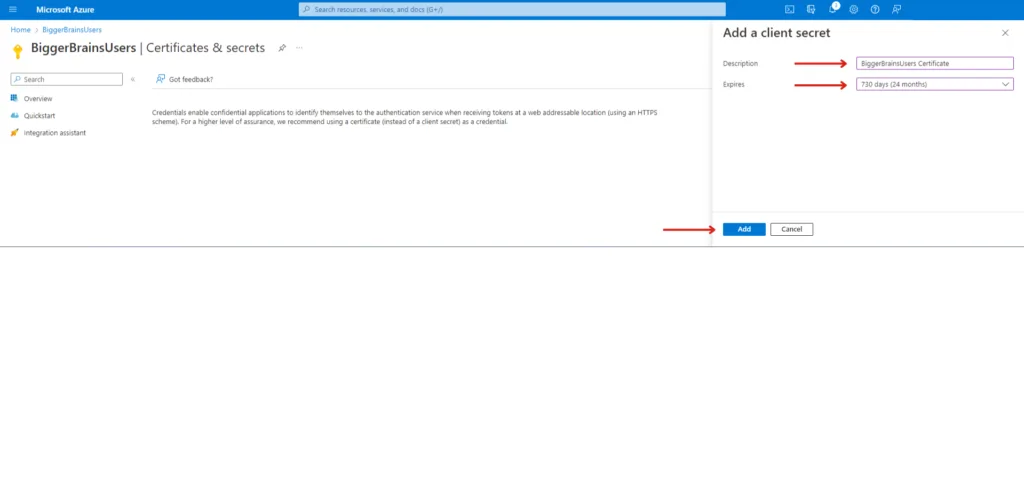
5. Add a Client Secret #
We now move to the final few steps to configure a certificate and associate it to the application to ensure the connections are securely established.

6. Importing Users Into the Team Management Portal #
Once the previous step is completed, open the Bigger Brains Team Management Portal. This can be done in the following two ways.
- If you are a Reseller, in the Reseller Portal on the Teams tab, click the Manage Team icon next to the team you want to connect to.

2. If you are a Team Leader, you can login to Brainstation with you normal user account and click Manage Team from the Team Leader menu.

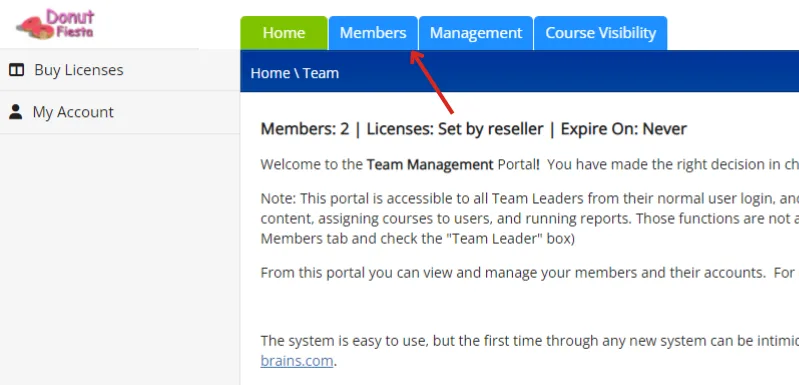
From here, click on the Members tab. Select the Add Member option from the left side menu.

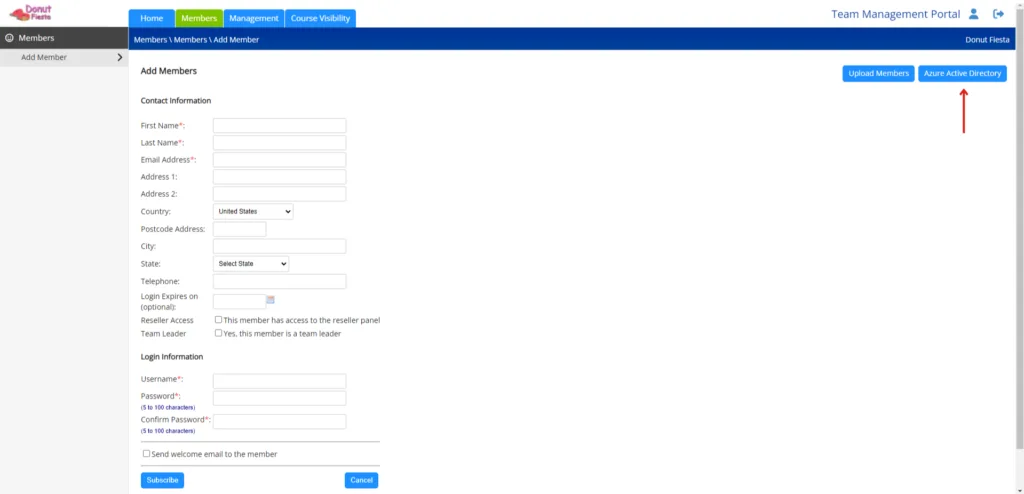
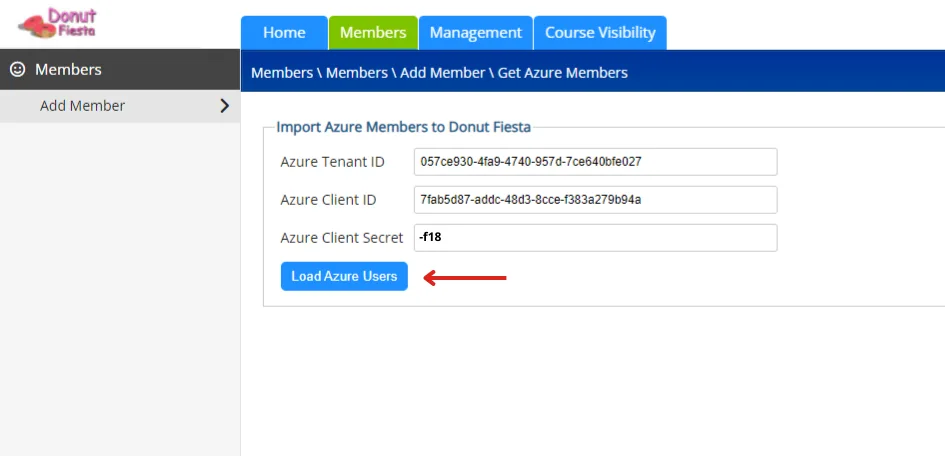
From here, enter the Tenant ID, Client ID, and the Client Secret Value to the correlating field and select Load Azure Users.
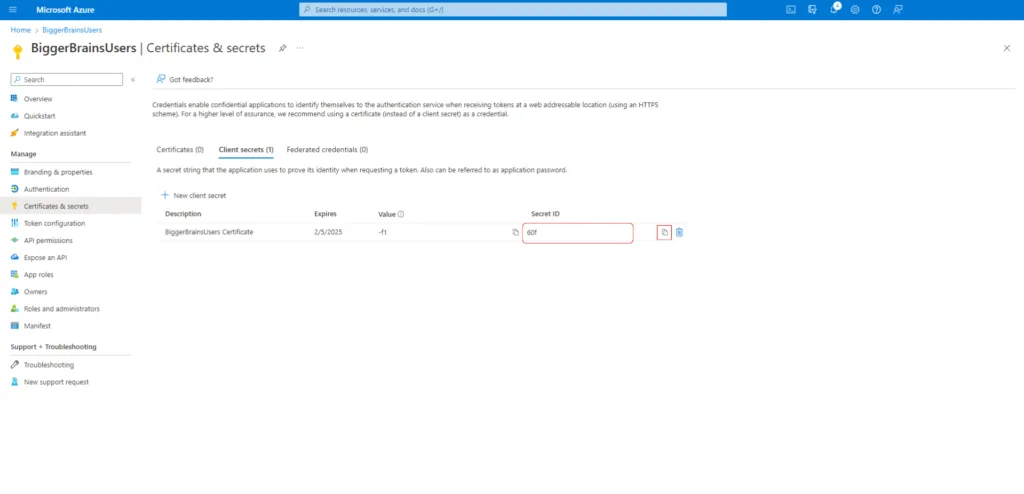
Remember, the Tenant ID and Client ID can be accessed through the Overview tab from the left side menu in Entra. Additionally, the Client Secret Value can be found in the Certificate & secrets tab under the Manage menu on the left sidebar.
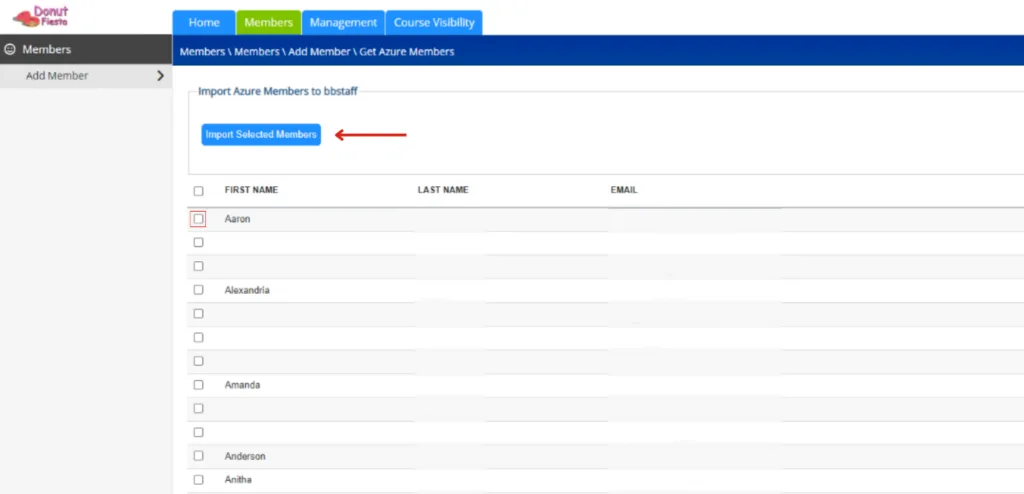
Note: If you select any users who already have a BrainStation account, you will see a red box pop up alerting you that Some members could not be validated. Scroll down through the list and to the right of the email column, you will see a red flag icon indicating that This email is already in use! Simply de-select any users already in use and select the Import Selected Members button again.
To see the members who have been imported into BrainStation, click on the Members tab of the Team Management Portal. On this screen you should be able to see all the users who have access to BrainStation.
This completes the process for importing users in the Bigger Brains Team Management Portal if the user information is incorrect you can navigate to your organization’s Members tab to edit user information.
Another Method to Compete Steps 1-5: #
1. Automate the Process with PowerShell Scripts #
Bigger Brains provides the PowerShell script below as a way to automate the Azure App creation process described in this document. This PowerShell script is provided as a ‘beta’ feature with no warranty, so proceed with caution, however in our internal testing it has worked well.
The basic flow is simple: Run the PowerShell script, enter your tenant ID if prompted, enter a name for the app, and the script will do everything in steps 1-5 in this guide, delivering the IDs needed for step 6.
1. Download this PowerShell script and save to your hard drive in an easy-to-remember path. #
Note: The download is zipped for safety, unzip the file and us the .ps1 file as the script. If the above link does not work, copy and paste this into your browser:
2. Run PowerShell on your Windows computer. For PowerShell on other platforms, see this page. #
Note: It is generally NOT necessary to “Run As Administrator” with this script, however if you run into difficulties you might try that.
3. Because this script is unsigned, you likely need to set the PowerShell Execution Policy to run unsigned apps. #
Do this by typing this command in PowerShell: Set- ExecutionPolicy -ExecutionPolicy Bypass
4. Run the script by typing the path and file name. #
If the script file is saved in the root folder of your C: drive, you would type: c:\RegisterAdApp.ps1
5. The script will now run. Note there may be long pauses as the script downloads and installs PowerShell modules for Microsoft Graph and Azure AD cmdlets. You may see notifications that these items are being installed. #
6. When prompted, enter a name for your App. The actual name is not important, we recommend something descriptive like “Bigger Brains Azure Import App”. #
7. The script will try to detect your Azure tenant ID if you are logged in. If a tenant ID is detected, it will prompt you to confirm the tenant ID. If it is unable to find a tenant ID, it will prompt you for yours. #

To find your tenant ID, login to https://portal.azure.com, search for “tenant properties”, and in that page you will find your tenant ID.
8. The script will continue running after the tenant ID is entered. Various progress or error messages may appear. #
9. When the script completes successfully, you will find the three key credentials needed for the Azure AD Import (Entra ID Import) displayed in green: #
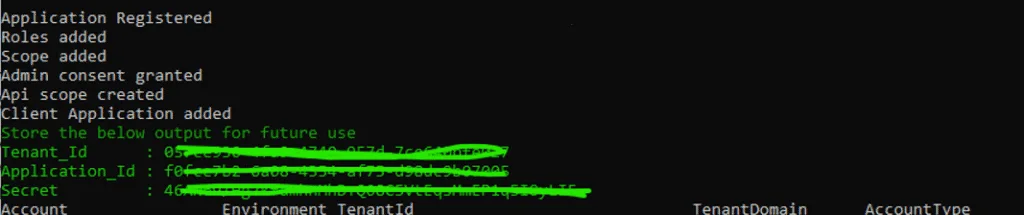
10. At this point the script is completed and PowerShell may be closed (after you copy those credentials!) and you can proceed with step 6 in this Guide. #
For any support question please contact support@bigger-brains.com


